An Intelligent Pipe Measurement System
 |
Ship repair involves, to a very large extent, the replacement of old
worn pipes. Central to this is the need to measure accurately flanged pipes
in 3D co-ordinates, including straight sections, toroidal bends and reducers,
and the relative positions of the end flanges with respect to the centreline
orientation of the pipes. From these measurements, new pipes are fabricated
to replace the worn pipes. The new fabricated pipes must match dimensionally
the worn pipes to a sufficient degree of accuracy, typically in the order
of 1-2 mm.Typical diameters of such pipes range from around 100mm to more
than 350mm with lengths of up to 6m. The weights of such pipes can be up
to almost a ton. |
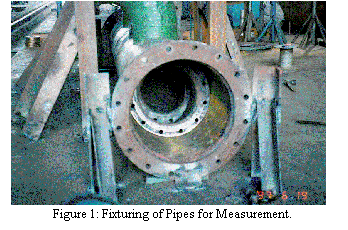
The current procedure used in many shipyards in performing both measurement
and fabrication is primarily a slow and tedious manual process. It involves
placing the worn-out pipe onto a large steel base, fixing mating flanges
onto all the end flanges of the worn-out pipe, and manually welding these
mating flange onto the base to produce a fixture for subsequent fabrication,
as shown in Figure 1. Additional supports are fabricated and installed
as necessary to firmly fix the pipe to the steel base.
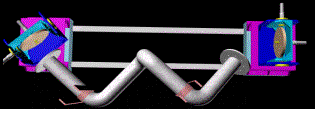
| Figure 2: Computer-controlled pipe fixturing system

|
A research
project, funded jointly by both NSTB and local shipyards, is now being
undertaken in the Department of Mechanical & Production Engineering
which aims at the development of an automated Intelligent Pipe Measurement
System (IPMS).In the IPMS system, a computer-controlled robotic fixturing
system is used to hold, and at the same time, measure the relative coordinates
of the end flanges of the old pipes. This is illustrated in Figure 2.
|
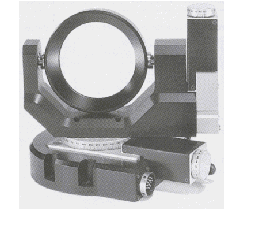
| A laser ranging system, together with a machine vision system, mounted
on an instrumented two-degree-of-freedom gimbal system (see Figure 3) is
then used to measure the co-ordinates of a specified number of points on
the surface of the pipe. The vision system is first used to determine the
outlines of the pipe and, from this, the approximate locations of the points
to measure. The computer-controlled laser ranger is then moved to target
these points one at a time and their co-ordinates in 3D space measured.From
these measurements, the diameter of the pipe, and the 3D cordinates of
the centreline of the pipe is determined. The robotic fixturing system
is also instrumented with sensors which allows the computer to determine
the type of flanges used. |
Figure 3: Two-axis gimbal for camera and laser

|
With all this information, the complete geometry of the pipe is thus obtained
and production drawings can then be produced to facilitate the fabrication
process. Data on the pipe measured, and its identification, are stored
in the computer for subsequent retrieval when needed.
The robotic fixturing system
is subsequently used in the fabrication process. Here, from the identification
number of the old pipe measured, the robotic fixture is positioned to the
positions where the end flange should be and the flanges of the new pipe
is welded with the assistance of this fixture. The geometry of the newly
fabricated sections of pipes can also be measured on-line by the system
and checked with its stored geometry for accuracy and adjustments can be
made, where necessary. In this way the dimensional accuracy of the newly
fabricated pipe is controlled to within the desired tolerances.
This project is carried
out in collaboration with Assoc Prof Marcelo Ang Jr, Dr Senthil
Kumar, MrYang Peirong, Mr Xi Weiya, Mr HC Mok and Mr AC Lim.
Contact: Prof
Poo Aun Neow, Assoc
Prof Marcelo Ang Jr
Oct. 2000, by E. Burdet
